Exercise 5.3: Add behavior to our Xamarin.Forms calculator
Lab goals
In this final exercise we will modify your Xamarin.Forms calculator application and supply the behavior for the Calculate button to add, subtract, multiply and divide the two entered numbers. To complete the exercise, we will perform the following steps together:
- Create local fields in the class to hold the
Entryelements we will be entering our numbers into - this will allow the code to access those elements to perform the calculations on. - Add in a new
StackLayoutview with a set of Label controls to display the results of the operations. We will hide the entireStackLayoutby setting theIsVisibileproperty tofalse. - Provide an event handler for the
Clickedevent on the Button. - In the event handler, provide the logic to get the two entered numbers from the
Entrycontrols and add, subtract, multiply and divide them (checking for a zero divisor) and put the answers into the new resultsLabel's. Then we will show the entire set of results by changing the resultStackLayout.IsVisibleproperty totrue.
When we are finished, our application will look like: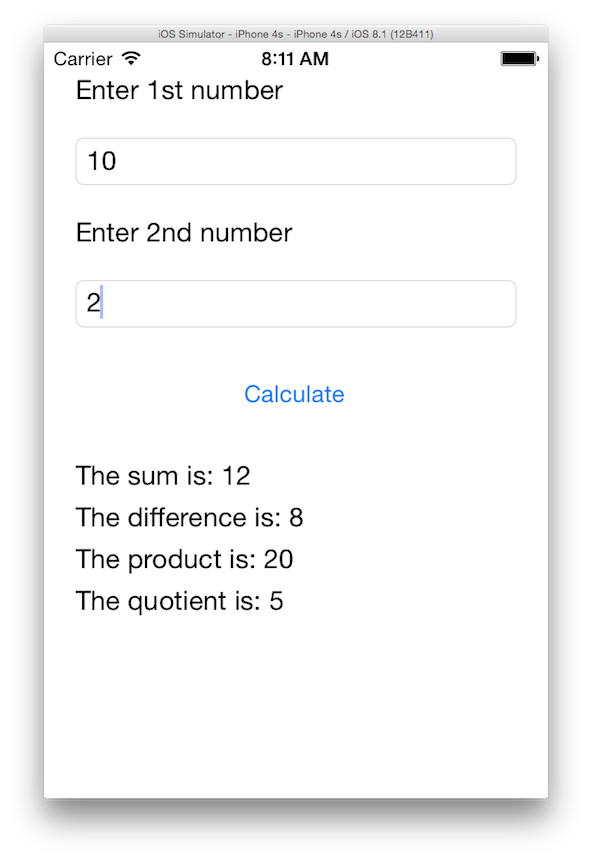
Steps
Try to use the picture and above steps to complete the lab exercise, referring to the slides if you need any help in creating the UI. You can also use the following step-by-step instructions to fill in any knowledge gaps.
Create fields for the Entry controls
First, let's capture the two Entryviews by placing them into fields in our App class. Create two fields in the class to store firstNumber and secondNumber and assign them in your constructor method. The method is currently creating local fields in the constructor itself.
using System;
using Xamarin.Forms;

namespace Calculator
{
    public class App : Application
    {
        Entry firstNumber, secondNumber;
        ...

        public App()
        {
           ...
           firstNumber = new Entry();
           layout.Children.Add(firstNumber);
           ...
           secondNumber = new Entry();
           layout.Children.Add(secondNumber);
        }
    }
}
Add in results labels
Next, let's add in the Label views we will use to display each result - one for each operation (add, subtract, multiply, divide). Since we only want to show these when you perform a calculation, we will create a new StackLayout to hold them all and hide it through theIsVisible property. This is a bool value (true/false) which determines whether it is shown on thescreen- changing the value causes the entireStackLayout and all the children in it to appear and disappear.
- In the constructor method, at the bottom (but before you assign the
MainPageproperty), create a newStackLayoutnamedresultsLayout. - Set the
IsVisibleproperty to false on theStackLayout- remember you can use the property-initializer syntax for this! Add four labels as children in the
StackLayoutsumLabel
differenceLabel
productLabel
quotientLabel
To hold each of the operations we will calculate.
Place all of the new objects into fields in the class - we will need to access these later when we handle the button click.
Here's a little C# shortcut: you can create, assign and add a UI element into a StackLayout in one line like this:
    Label myField; // field declared in the class
    ...
    layout.Children.Add(myField = new Label() { Text = "Hello" });
Notice how the label is created (new), assigned (=) and then added to the layout field all in one line.
public class App : Application
{
    ...
    StackLayout resultsLayout;
    Label sumLabel, productLabel, differenceLabel, quotientLabel;

    ...

    public App()
    {
        ...
        layout.Children.Add(calcButton);

        resultsLayout = new StackLayout {
            IsVisible = false
        };

        resultsLayout.Children.Add(sumLabel = new Label());
        resultsLayout.Children.Add(differenceLabel = new Label());
        resultsLayout.Children.Add(productLabel = new Label());
        resultsLayout.Children.Add(quotientLabel = new Label());

        layout.Children.Add(resultsLayout);

        page.Content = layout;
        MainPage = page;
    }
}
Add an event handler to the button Clicked event
We want to perform our calculations when the user taps our "Calculate" button. To do this, we need to be notified when this happens. We get notified about user interactions with events.
1.In the constructor method, just after the Button is created, add an event handler named OnCalculateClicked for the Clicked event.
Button calcButton = new Button() {
    Text = "Calculate"
};

calcButton.Clicked += OnCalculateClicked;

layout.Children.Add(calcButton);
Next, we need to create the method that is called when this happens - it must be named
OnCalculateClicked. You can look at the slides to see the signature and add the method yourself, or there's a cool trick that your IDE can do to help you.Right-click on the
OnCalculateClickedname after the += assignment. You should get a context menu which includes the choice Fix, if you hover over that, it will open to show a Create method option. If you click that, the IDE will create the method for you!

public class App : Application
{
    public App()
    {
        ...
        calcButton.Clicked += OnCalculateClicked;
        ...
    }

    private void OnCalculateClicked(object sender, EventArgs e)
    {
    }
}
Implement the calculator logic
In this final step, let's implement our calculator logic in the OnCalculateClicked method. Here we will retrieve the two numbers from our Entry controls, and perform each of the calculations - setting the results into our Label fields we created earlier.
- Use the Text property on
firstNumberto retrieve the string typed into theEntrycontrol. - You will then need to turn this into a number - we'll use an integer in this case. If you remember from the last class, we used the
int.Parse method to take astringand turn it into aninteger. Use that method here to get the first number. - Repeat steps 1 & 2 to get the second number using
secondNumber. - Next, perform all four calculations (add, subtract, multiply and divide) and get the numeric results. Remember to properly handle the zero divisor case - just set the result to (-1) if the second number is zero.
- Finally, using the string.Format method, create strings and assign them to your labels. This method works exactly like
Console.WriteLineexcept that it returns a string instead of writing the output to the console. It accepts the same replacement tokens, so for example, you can use the following for your addition result:int sum = number1 + number2; sumLabel.Text = string.Format("The sum is: {0}", sum); - Do the same for each of the math operations.
Lastly, set the
IsVisibleproperty on theresultsLayoutfield to true so it shows up on the screen.void OnCalculateClicked(object sender, EventArgs e) { int number1 = int.Parse(firstNumber.Text); int number2 = int.Parse(secondNumber.Text); sumLabel.Text = string.Format("The sum is: {0}", number1 + number2); differenceLabel.Text = string.Format("The difference is: {0}", number1 - number2); productLabel.Text = string.Format("The product is: {0}", number1 * number2); int result = -1; if (number2 != 0) result = number1 / number2; quotientLabel.Text = string.Format("The quotient is: {0}", result); resultsLayout.IsVisible = true; }Run the application and type in two numbers and press the Calculate button - you should then see your results!
- Here's the final application output.